Most smartphone photos can look dramatically better with just a few tiny edits—and most people never touch them. You tap the shutter, glance once, and post. But here’s the twist: a handful of quick tweaks can quietly turn that throwaway snapshot into something you’re proud to share.
Forty percent. That’s how much more attention people give your subject when a photo is simply cropped better. Not a new lens. Not a new phone. Just a few pixels trimmed from the edges. The quiet secret of “pro-looking” images isn’t advanced software—it’s learning which tiny adjustments actually matter.
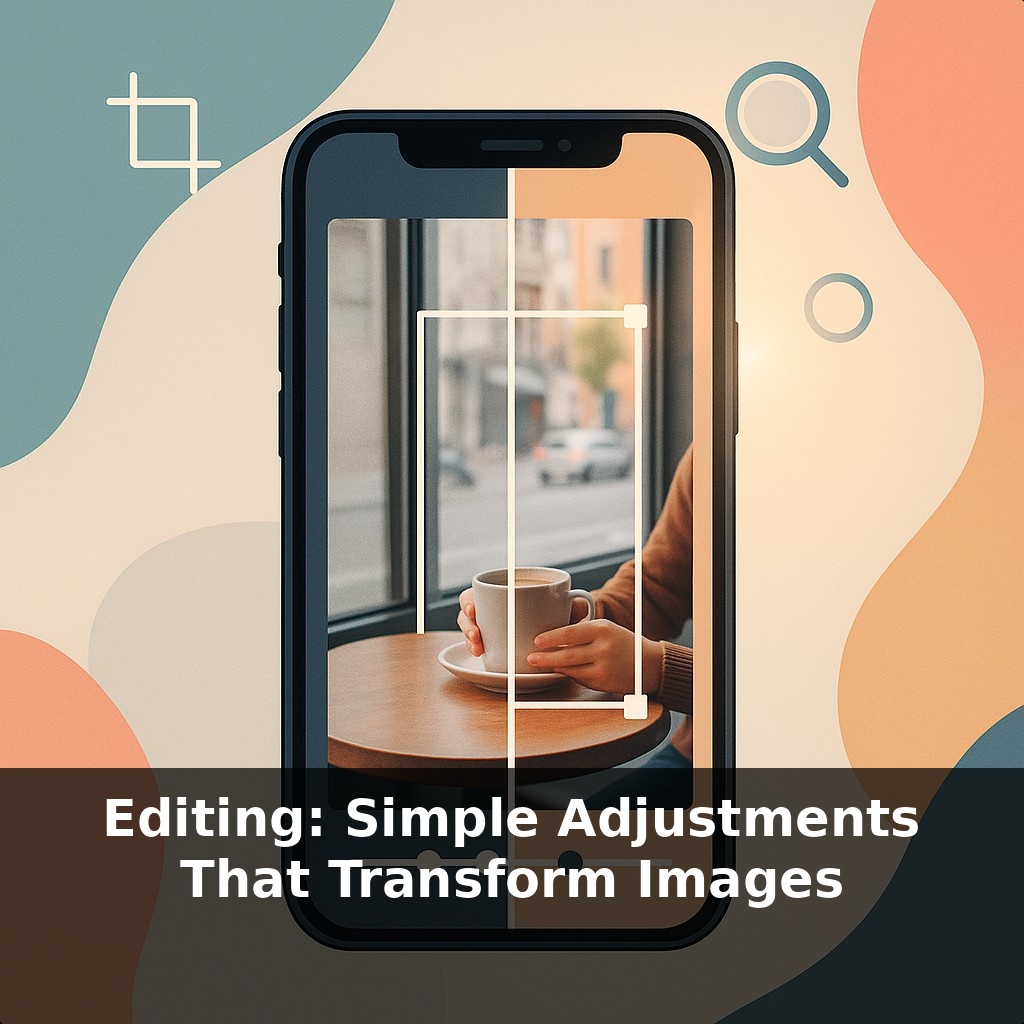
Most apps now put powerful tools behind icons you barely notice: a slider for light, a dial for color, a triangle for crop, a circle for detail. Used well, these aren’t about faking reality; they’re about getting the photo closer to how the moment *felt* when you tapped the shutter.
In this episode, you’ll see how four basic moves—reframing, balancing brightness, correcting color, and sharpening key details—do most of the heavy lifting. Think less “editing session,” more “30-second tune‑up” that fits into the pause before you hit share.
Think of this part as learning which knobs to reach for first, not mastering every button on the panel. The good news: those four core edits quietly fix the mistakes our eyes forgive but the camera records—cluttered edges, blown windows, murky faces, odd color tints, or soft details where it matters most. You’ll start to notice that certain problems repeat: backlit friends at dinner, dim cafés, harsh midday shadows, tungsten‑orange rooms. Each one has a predictable, quick rescue move. As we go, you’ll build a short mental checklist you can run through in seconds before you share anything.
Start with the frame, because everything else depends on it. Open your editor and go straight to the crop tool before touching any sliders. Ask a few quick questions: *What’s the actual subject? What’s stealing attention?* Trim bright distractions on the edges, tilt to straighten horizons, and test different aspect ratios. A square might make a single object feel iconic; a 16:9 crop can turn the same scene into a cinematic slice of a larger story. Tiny nudges—shifting a face off-center, cutting a cluttered ceiling—often matter more than dramatic cuts.
Once the frame feels intentional, move to light. Most casual shots are either a bit too dark and muddy or a bit too bright and washed out. Instead of yanking the main “brightness” slider, work top‑down with the more precise controls. Try this order: overall exposure, then highlights, then shadows. Exposure gets the general feel right; highlights protect bright areas like skies or white shirts; shadows recover detail in hair, jackets, or dark corners. Keep an eye on skin—if it turns chalky or plasticky, you’ve gone too far.
Color comes next, and it’s less about “making it pop” and more about making it believable. Start with white balance: slide warmer or cooler until neutrals (white walls, gray sidewalks) stop looking strangely blue or orange. Then nudge saturation or vibrance only enough that objects look closer to how you remember them. Think of editing like seasoning a dish: you’re not trying to hide bad ingredients, just bring out what’s already there so the moment feels alive rather than filtered.
Only after that is it worth touching sharpness. Zoom to 100 % and look specifically at eyes, text, or important textures. Use sharpening or “structure” tools gently, and avoid global, heavy settings that make skin gritty or halos glow around edges. If the original was badly blurred from motion or missed focus, sharpening won’t resurrect it—treat it as a subtle clarity boost, not a magic fix.
Every image won’t need all four steps equally. A clean daylight scene might only want a mild crop and a touch of warmth; a dim restaurant portrait might lean heavily on exposure and color while keeping sharpening minimal. Over time, you’ll start to recognize which “knob” each situation calls for and skip straight there instead of randomly swiping sliders and hoping for a miracle.
Open your gallery and scroll to three very different moments: a busy street, a quiet portrait, and a messy kitchen table. Treat each one like a tiny “case study” in what it’s *trying* to say. On the street shot, your job is to decide whose story it belongs to—the vendor, the crowd, or the architecture—and trim everything that doesn’t serve that choice. With the portrait, act like a lighting designer: lift just enough brightness that you’d recognize this person across a room, then adjust color until their clothes and surroundings feel like a place you’d actually stand in. For the kitchen table, think like an editor laying out a magazine page: which objects earn their spot, and which are visual noise? Nudge the crop until the remaining items feel arranged on purpose, then tap in a hint of sharpness wherever you’d want a reader’s eye to land.
Your challenge this week: each day, pick one “ordinary” photo and push it in two different directions—one bolder, one more restrained. Then notice which version actually holds your attention longer.
Soon your camera won’t just save a flat image—it’ll save options. Depth maps, alternate exposures, even multiple focus points will sit quietly behind every frame, like extra ingredients waiting in the fridge. AI will propose one‑tap “looks,” but the same habits you’re building now—deciding what matters, where to brighten, what to mute—will shape how you accept or override those suggestions. The more fluent you become, the less likely you are to let presets speak for you.
As you start nudging sliders with intent, you’ll notice pattern recognition kicking in—like learning which streets get you home fastest. Soon you’ll pre‑visualize the final frame as you shoot: leaving space to crop, watching for blown windows, spotting odd color casts. Editing stops being rescue work and becomes a quiet habit of finishing the thought your camera began.
Start with this tiny habit: When you open a photo on your phone that you like, tap “Edit” and move just ONE slider—either bump the exposure up or down by no more than 10. Don’t worry about making it perfect; just ask yourself, “Can I see the subject more clearly now?” and stop there. Do this with only one photo a day so it feels almost too easy. Over time, you’ll start to notice what tiny exposure tweaks make your images feel more intentional and polished.